


By adsturbo.ai | Published 2026-09-30 | Updated 2026-09-30
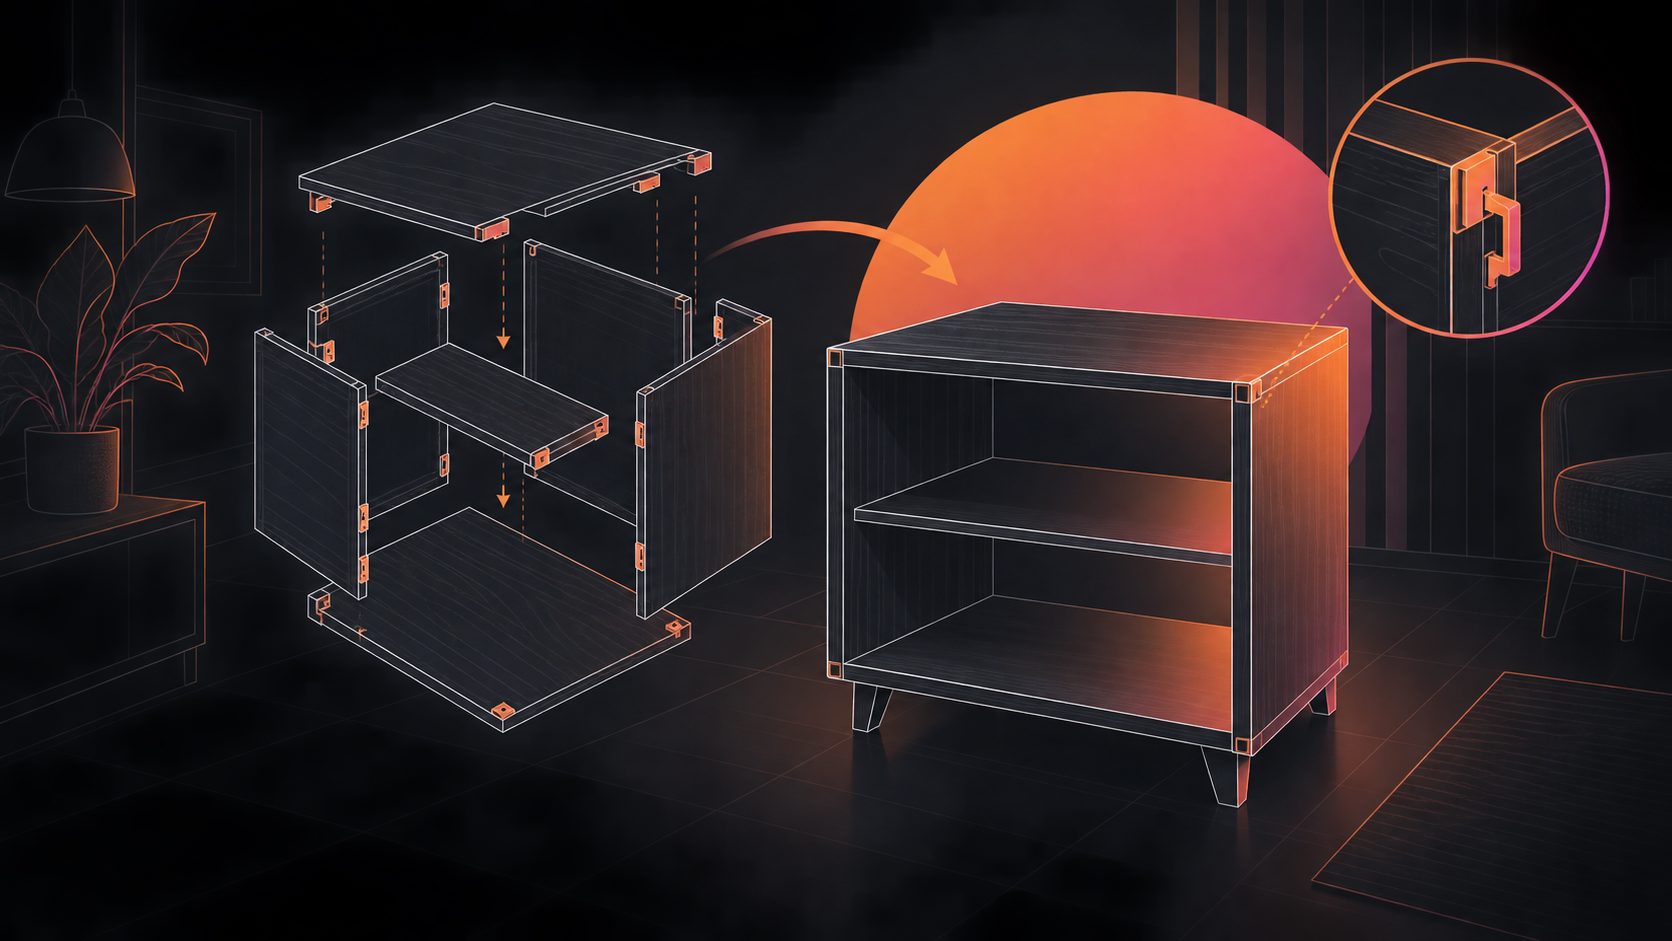
A tool free furniture assembly video should prove one thing quickly: the buyer can connect the main parts without searching for a drill, confusing hardware, or a second instruction manual. For Amazon and DTC furniture sellers, the strongest version is usually a short, close-up demonstration that shows the connector, the hand action, the final lock, and the finished result.
The goal is not to document every assembly step. It is to remove the highest-risk moment between purchase and successful setup.
What is a tool free furniture assembly video?
A tool free furniture assembly video is a short product demonstration showing how furniture components connect without power tools or traditional hand tools. It should make the assembly mechanism visible, repeatable, and easy to understand within the first few seconds.
Existing furniture brands commonly use videos, diagrams, and interactive guides to show step-by-step assembly. Way Basics emphasizes a “peel, stick, and done” process for its modular products, while Blum’s assembly resources separate individual work steps and adjustment options into visual demonstrations. (waybasics.com)
For ecommerce sellers, however, the video has a different job from a full instruction manual:
- The manual explains completeness.
- The product page video proves simplicity.
- The advertisement creates confidence before purchase.
That distinction matters. A buyer rarely needs to see every panel placed in sequence during a 15-second ad. They need to see the moment that previously looked difficult become obvious.
Why the connector close-up matters more than a wide product shot
The most important shot is often not the finished bookshelf, cabinet, table, or storage unit. It is the connection point where the customer might hesitate.
Common friction points include:
- Identifying which edge faces up.
- Aligning two panels correctly.
- Understanding whether parts slide, press, rotate, or clip together.
- Knowing when the connection is fully locked.
- Trusting that no hidden tool is required.
A wide shot communicates appearance. A macro shot communicates usability.
This is especially important for tool-free systems that use clips, blocks, dowels, slots, adhesive boards, or proprietary connectors. One furniture instruction sheet describes a connector process in three visible actions: align the blocks, slide them together, then press the metal clip into place. That sequence is ideal for video because each action can become a separate visual beat. (kolcraft.com)
An original planning method: the Friction-Point Score
Before filming or generating the video, score each assembly moment from 1 to 3:
| Score | Assembly moment | Video treatment |
|---|---|---|
| 1 | Obvious action, such as placing a shelf | Show briefly |
| 2 | Direction or alignment could confuse buyers | Add an arrow or caption |
| 3 | Locking, clipping, or weight-bearing connection | Use a close-up and repeat the action |
Build the 15-second video around the highest-scoring moment first. This creates a more useful ad than simply showing the product rotating on a table.
How to structure the 15-second assembly demonstration
A concise structure can communicate the full value without becoming a miniature instruction manual.
0–2 seconds: Show the problem-free promise
Open with the product parts already positioned near the connection point. Use a short overlay such as:
“No drill. No screws. Snap it together.”
Avoid opening with packaging, a logo animation, or a distant room scene. The first two seconds should identify the practical benefit.
2–6 seconds: Show the alignment
Use a top-down or 45-degree angle so viewers can see the orientation of both pieces. Add a simple directional arrow if the parts need to slide or rotate.
The key is to preserve spatial clarity. Do not cut between so many angles that the viewer loses track of the parts.
6–10 seconds: Show the locking action
This is the proof moment. Slow down the clip slightly if necessary and show the connector completing its action. A subtle click, snap, or visual confirmation can make the mechanism feel more trustworthy.
For a cabinet, shelf, dresser, or table, keep the hands in frame. Hands provide scale and make the action feel achievable for an ordinary customer.
10–13 seconds: Apply a light stability check
Do not exaggerate the test. A simple hand press, gentle pull, or small shake can show that the panel is seated. The purpose is not to claim a laboratory strength rating; it is to confirm that the assembly step is complete.
If the product has a published load limit, show that information separately and only use the verified specification.
13–15 seconds: Reveal the finished product and CTA
End with the assembled item in its intended room or use case. Suitable calls to action include:
- “Assemble in minutes.”
- “No tools required.”
- “See the full setup guide.”
- “Build your space without the hassle.”
The final frame should preserve enough product visibility for mobile viewers to recognize the item immediately.
What to include for Amazon and DTC product pages
The same core footage can support multiple placements, but the text and framing should change.
Amazon listing video
Prioritize:
- A clean product view.
- Minimal promotional wording.
- Clear proof of the assembly mechanism.
- Captions that remain readable on mobile.
- A final shot showing the actual product in use.
For related product-page creative, sellers can also turn existing marketplace images into short advertising assets through a 15-second Amazon product video workflow.
DTC product page
A branded website can support more context. Add:
- A short “how it works” headline.
- A comparison between tool-free assembly and conventional assembly.
- A link to the complete installation guide.
- Lifestyle footage showing the furniture after setup.
- A reassurance message about included components.
The product page can also place the video near shipping, returns, or reviews because assembly anxiety often appears alongside purchase-risk questions.
Paid social ads
For TikTok, Reels, and Shorts, use a vertical 9:16 composition. Keep the connector in the center safe zone and place captions above the hands rather than across the product.
A useful creative system is to produce three variations:
- Mechanism-first: focuses on the connector.
- Time-first: focuses on the short setup process.
- Lifestyle-first: begins with the finished room, then proves how it was assembled.
For broader product creative, a UGC ad workflow built from one product photo can provide additional presenter-led variations without requiring a live creator shoot.
How to make the video without a full production setup
A product seller can start with a real assembly clip, product photos, or a reference video. The most important source material is a sharp view of the connection point and a clear understanding of the assembly sequence.
AdsTurbo supports product video generation from JPG or PNG product images, with optional selling points and promotional information. It also provides clip-by-clip editing, subtitles, background replacement, video translation, and product-focused creative workflows. For sellers testing several SKUs, the TikTok Shop bulk video generation workflow can help organize multiple creative versions around the same production logic.
When using generated or edited footage:
- Keep the connector shape consistent.
- Do not invent hardware that is not included.
- Do not show a tool-free claim if a tool is required for part of the process.
- Match the hand movement to the real assembly direction.
- Check that captions do not cover the actual locking action.
- Export separate versions for 9:16, 1:1, and 16:9 placements when needed.
AdsTurbo Video Subtitle can automatically transcribe speech, create time-synced captions, and export either a video with embedded subtitles or a separate subtitle file. Its asynchronous generation system supports status polling or Webhook completion events, which is useful when sellers are processing multiple creative tasks.
Common mistakes that make “easy assembly” look difficult
The most common mistake is showing the result without showing the mechanism. A beautiful finished room cannot answer whether the customer will understand the first connector.
Other problems include:
- Using a wide shot for a small locking detail.
- Cutting away immediately after the hand reaches the joint.
- Showing too many parts at once.
- Adding captions such as “easy” without visual proof.
- Using a fast montage that hides the orientation of each panel.
- Showing an actor who assembles the product unrealistically quickly.
- Mixing a real product with a visually different generated component.
A useful quality check is to mute the video and ask: Can a viewer still understand the assembly direction? Then watch it without captions and ask: Does the visual action prove the claim by itself?
Frequently asked questions
Is a 15-second video long enough to explain furniture assembly?
Yes, if the video focuses on one high-friction connection rather than every assembly step. Use a longer tutorial or downloadable manual for complete instructions, and use the short video to establish confidence before purchase.
Should the video show tools even when they are not required?
No. Showing a drill, screwdriver, or Allen key can create uncertainty and weaken the tool-free positioning. If a tool is optional, label it accurately rather than implying it is necessary.
Should sellers use captions in an assembly video?
Yes. Captions help communicate the benefit when the viewer watches without sound. Keep them short and synchronized with the action, such as “Align,” “Slide,” “Press,” and “Locked.”
Can one assembly video be reused across marketplaces?
The core footage can be reused, but the crop, caption placement, aspect ratio, and final CTA should be adapted for Amazon, product pages, TikTok, Meta, and YouTube Shorts.
What should the final frame show?
Show the fully assembled furniture in a realistic use environment, with the product clearly identifiable. Add one verified benefit or CTA, not a crowded list of claims.